Getting Started
System Requirements
Before you begin using Cloudoberry, it’s important to ensure that your system meets the necessary requirements for optimal performance and compatibility. This section outlines the hardware, software, and network prerequisites for deploying and using the Cloudoberry platform efficiently.
Supported Operating Systems: Windows (Win 10, Win 11), macOS.
Supported Browsers (Recommended): Chrome, Firefox, Safari, Edge.
Internet Connection: Required for cloud integration and updates.
Set Up Roles and Permissions:
Cloudoberry supports three types of user roles
- Super Admin
- Team Admin
- End Users
Super Admin: Super Admins are administrator users with full access to customer cloud environments, including AWS, Azure, and GCP.
Super Admins cannot be assigned from within the application. Instead, a new Super Admin must be added by including the user account in Azure Entra ID.
The steps to add a Super Admin are as follows:
Step 1: Login using organisation id into Azure portal https://portal.azure.com.
(Note: The application support SSO and will automatically log in using the current id if already signed-in using in other Enterprise Application in browser and session is valid).
Step 2: Select Entra ID from the home screen
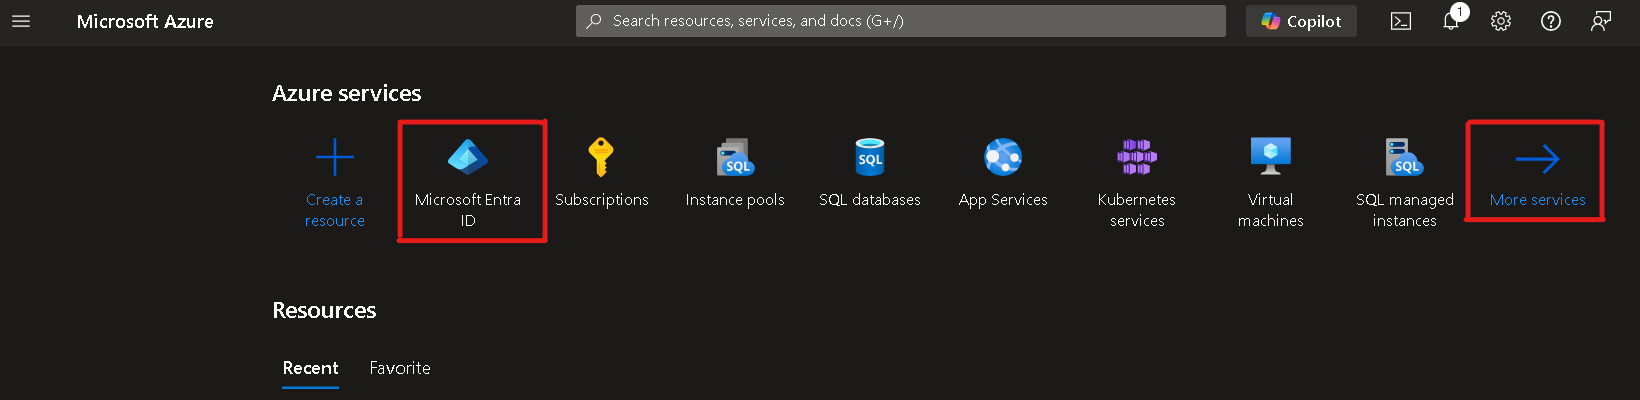
If you can’t locate it on the main page then press the “More Services”, you will find it there.
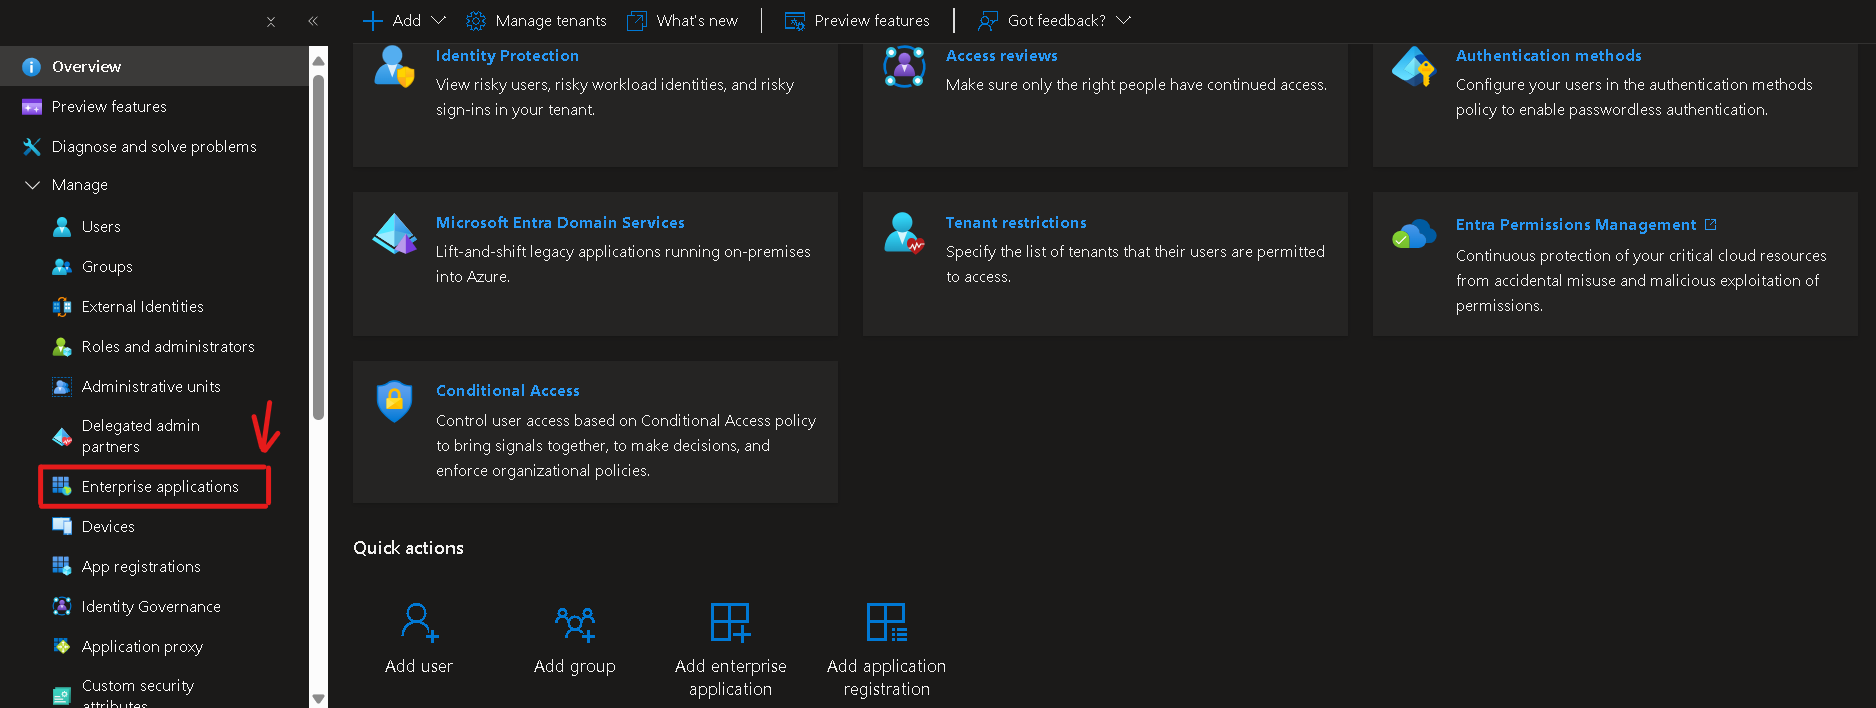
Step 3: Select ‘Enterprise Applications’ from Entra ID left navigation bar.
Step 4: Search for ‘Cloudoberry’ in the Enterprise Application lists.
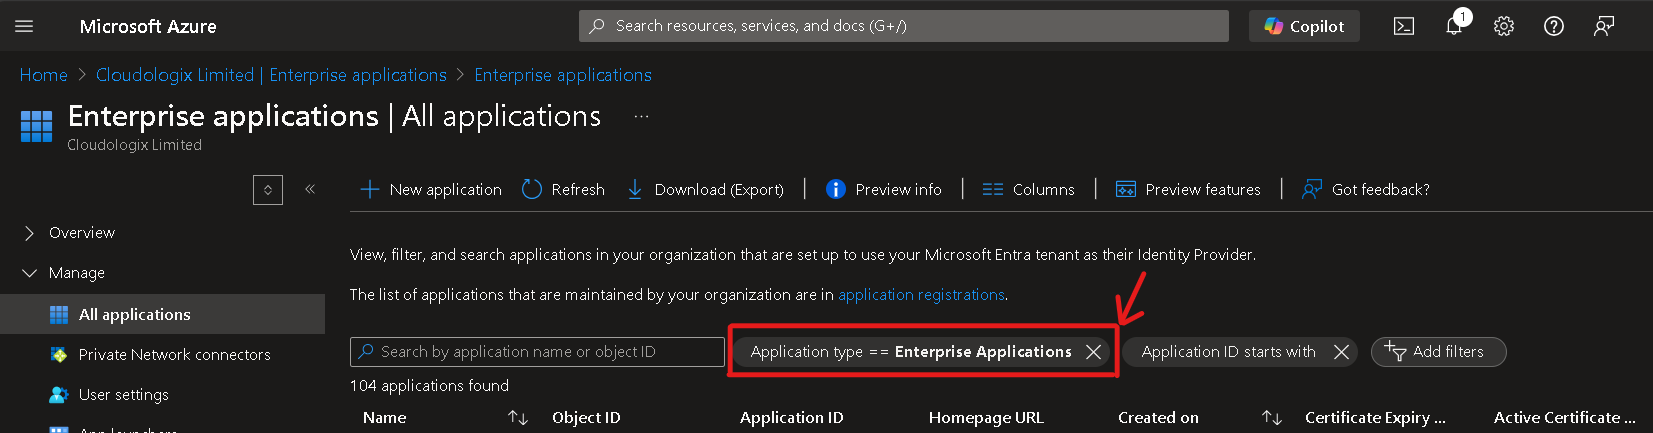
(Note: If the application is not listed/shown, please remove the filter - ‘Application Type == Enterprise Application’)
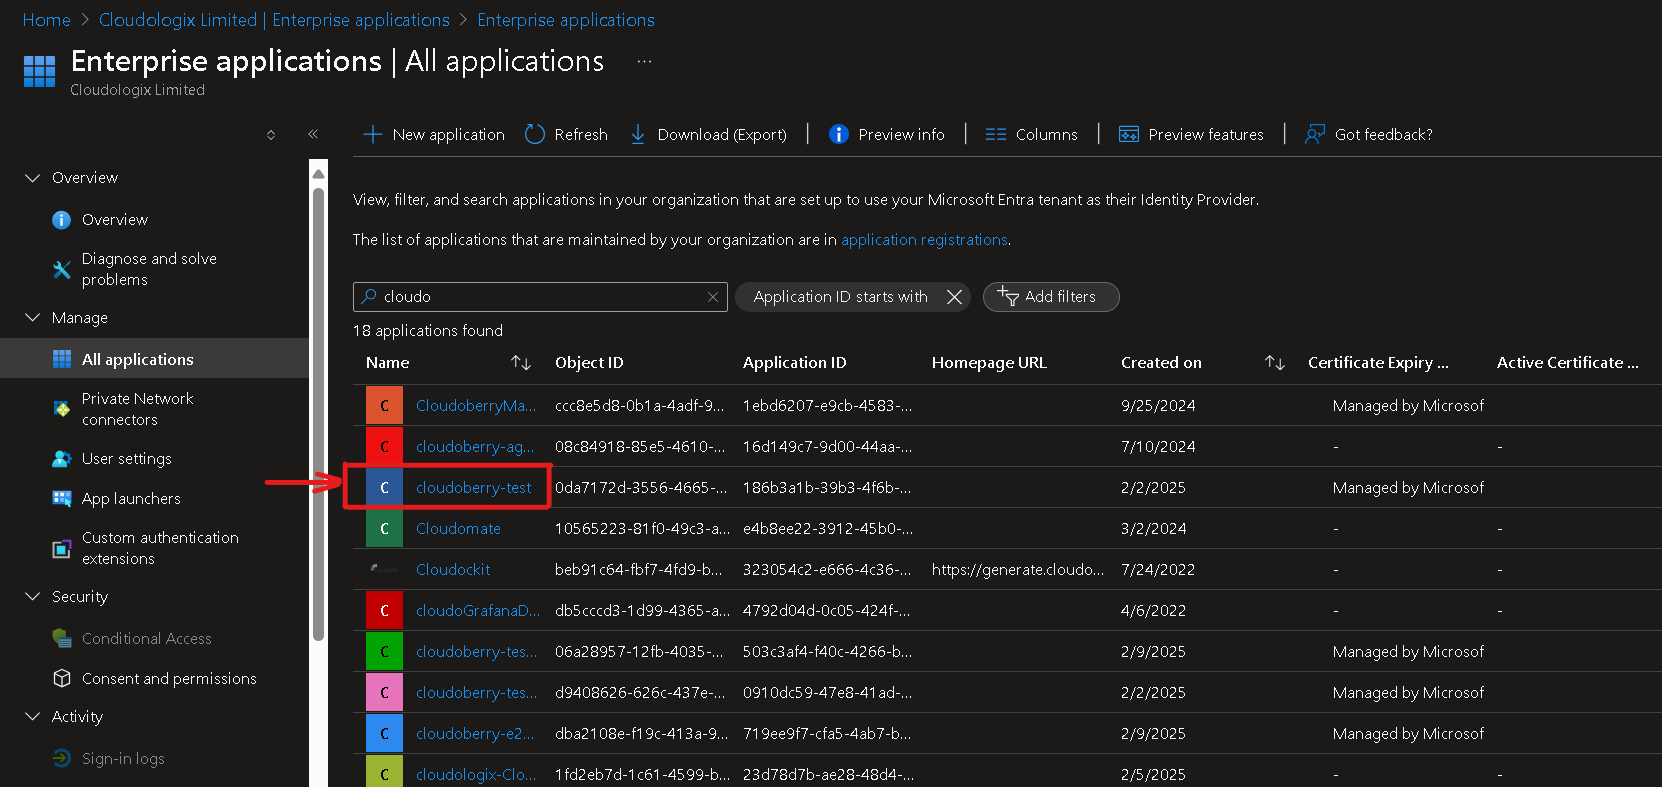
Step 5: Select ‘Cloudoberry’ or whichever name administrator has assigned for the App Registration to support Cloudoberry installation.
Step 6: Select ‘Users and Groups’ from the left navigation bar of the enterprise application.
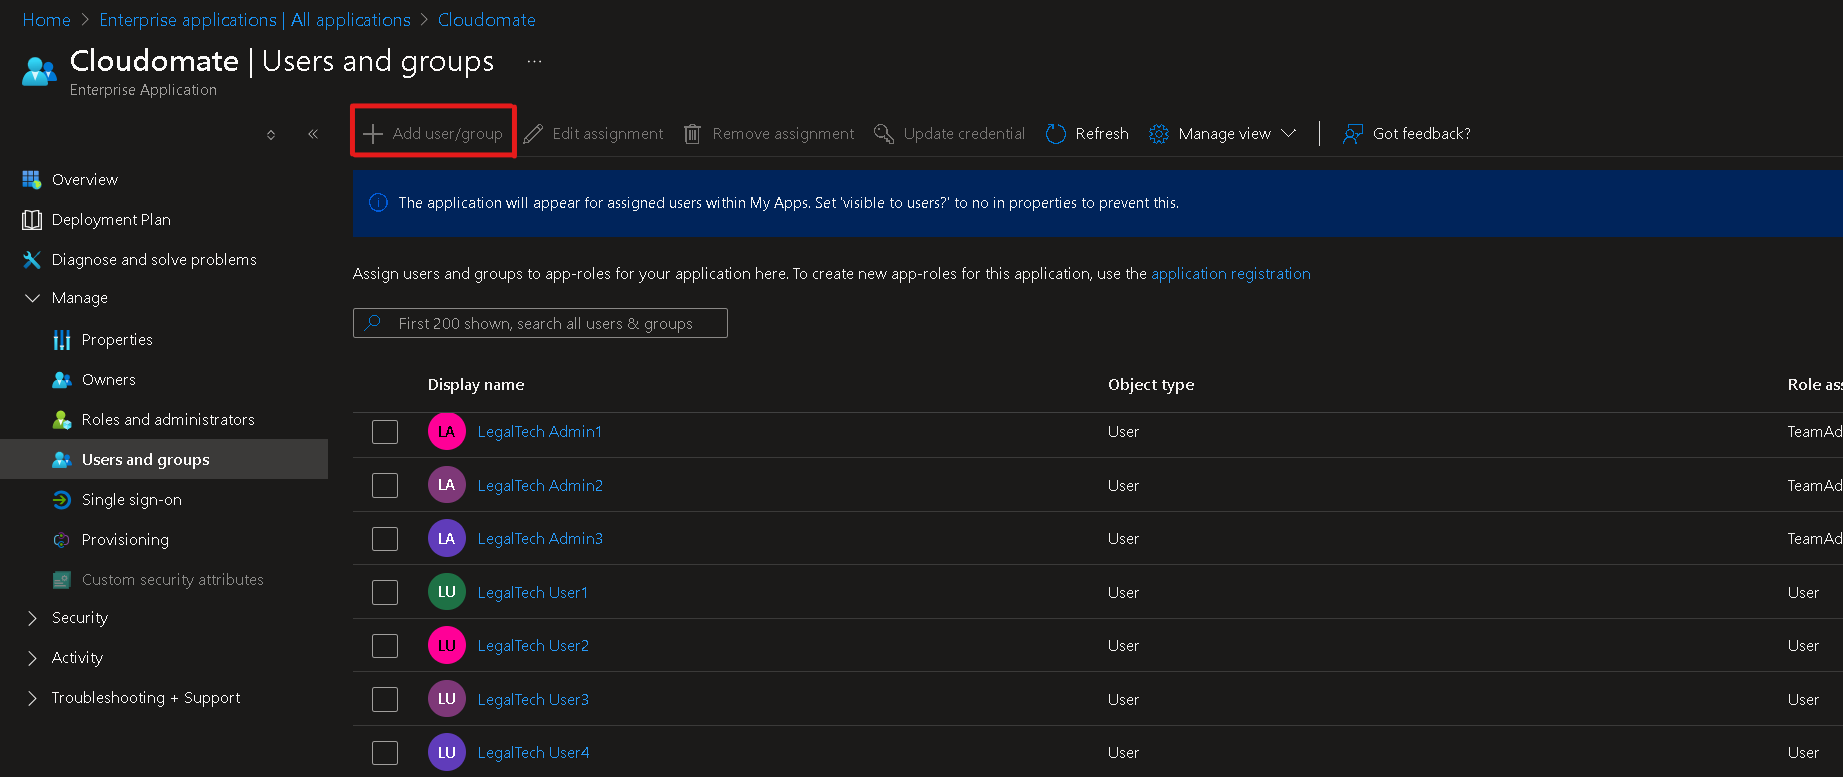
Note: This step will show all the existing users from all levels (Super admins, team admins and normal resource users). The ‘Team Admin’ and ‘User’ role access is managed from within the application.
For adding a new Super admin, click on -> ‘Add User/Group’ on the top of the screen.
- Select User ID to whom Super Admin role need to be assigned.
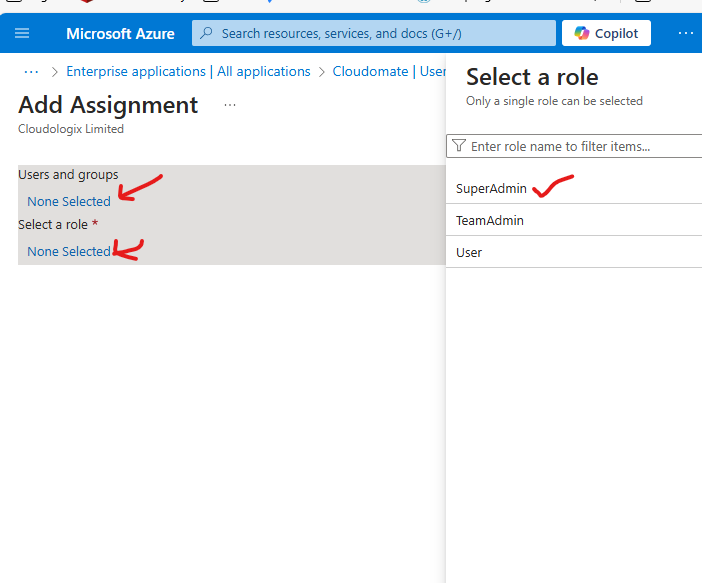
Step 7: Select Super Admin Role from ‘Select a Role’ panel.
Step 8: Select and Assign.
Step 9: Confirm if the user is now listed with Super Admin role in the list.