User Roles and Permissions
Team Admin
A Team Admin is a user role with elevated privileges that enable them to manage a specific group or department within an organization, without having full access to the entire system like a Super Admin. This role is designed to delegate administrative responsibilities at a more localized or team-specific level, allowing organizations to scale effectively while maintaining control over access and security.
Responsibilities:
Manage landing zones and application infrastructures assigned by the Super Admin.
Grant End Users access to specific applications.
Monitor activities, receive notifications, and access cost matrices.
Capabilities:
Access team-specific settings and resource management.
Manage End User access to applications within assigned landing zones.
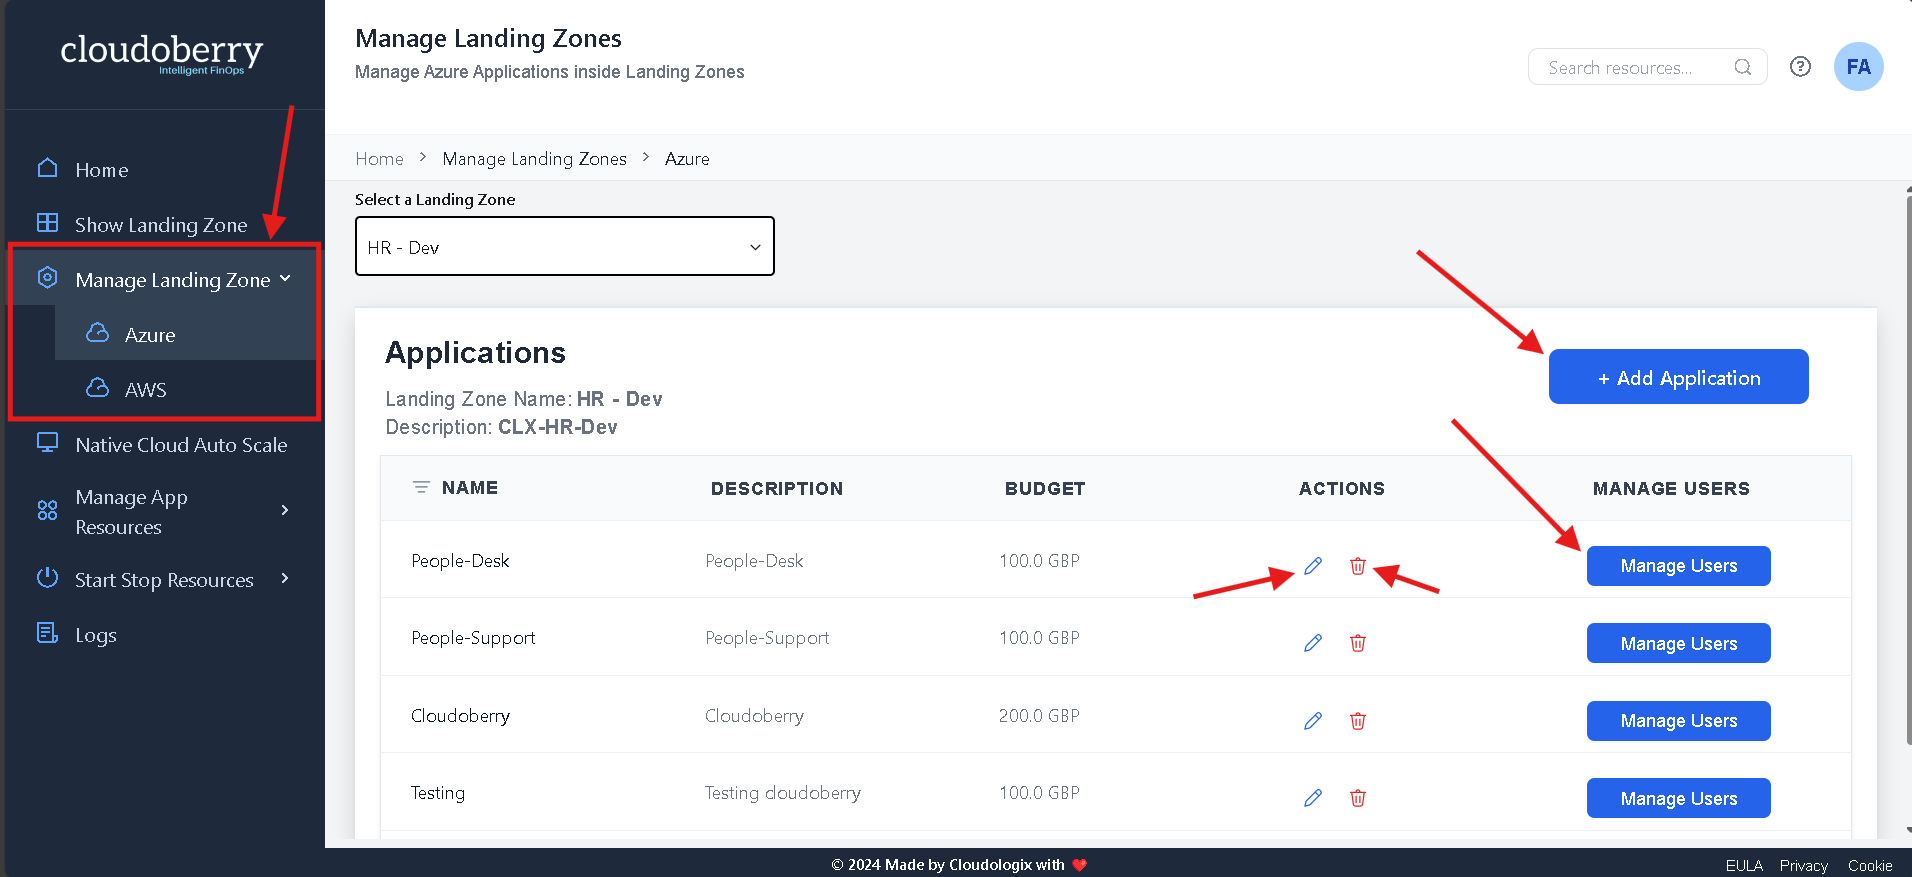
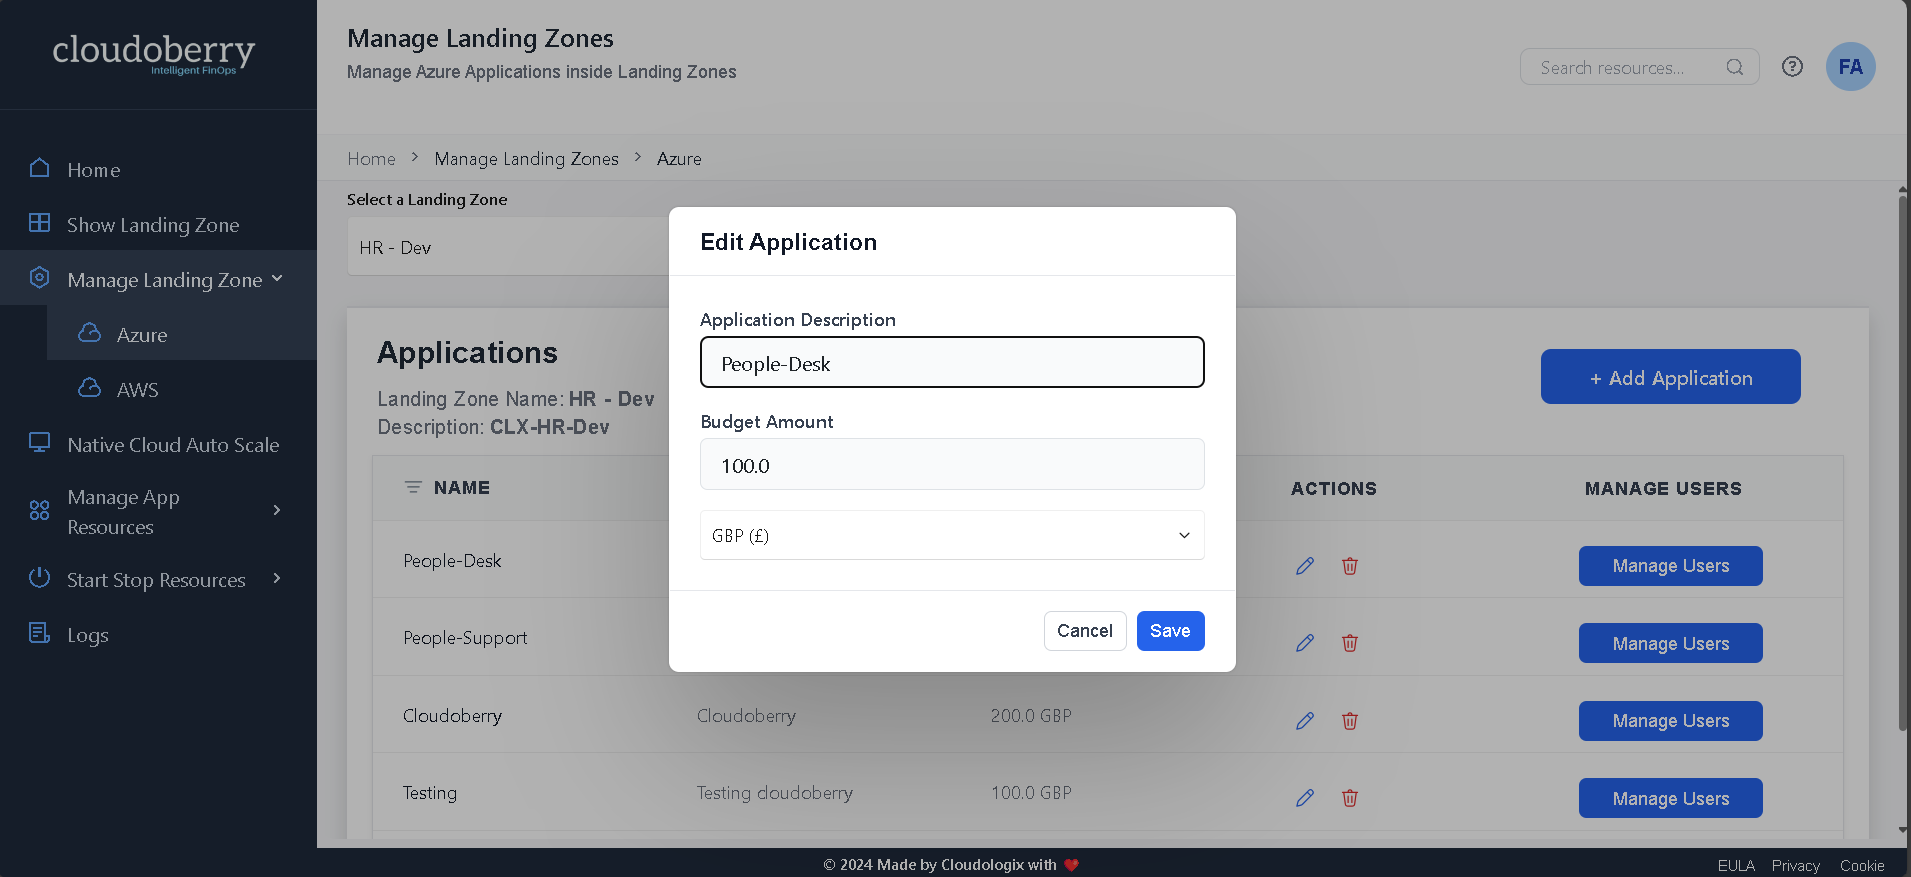
Add applications by clicking "Add Application." For example, a Team Admin can add an application named People-Desk, provide a description, and manage users by adding or removing them.
To do this, first navigate to the "Manage Landing Zone" page via the navigation panel. For Azure, go to the Azure tab; for AWS, select the AWS tab.
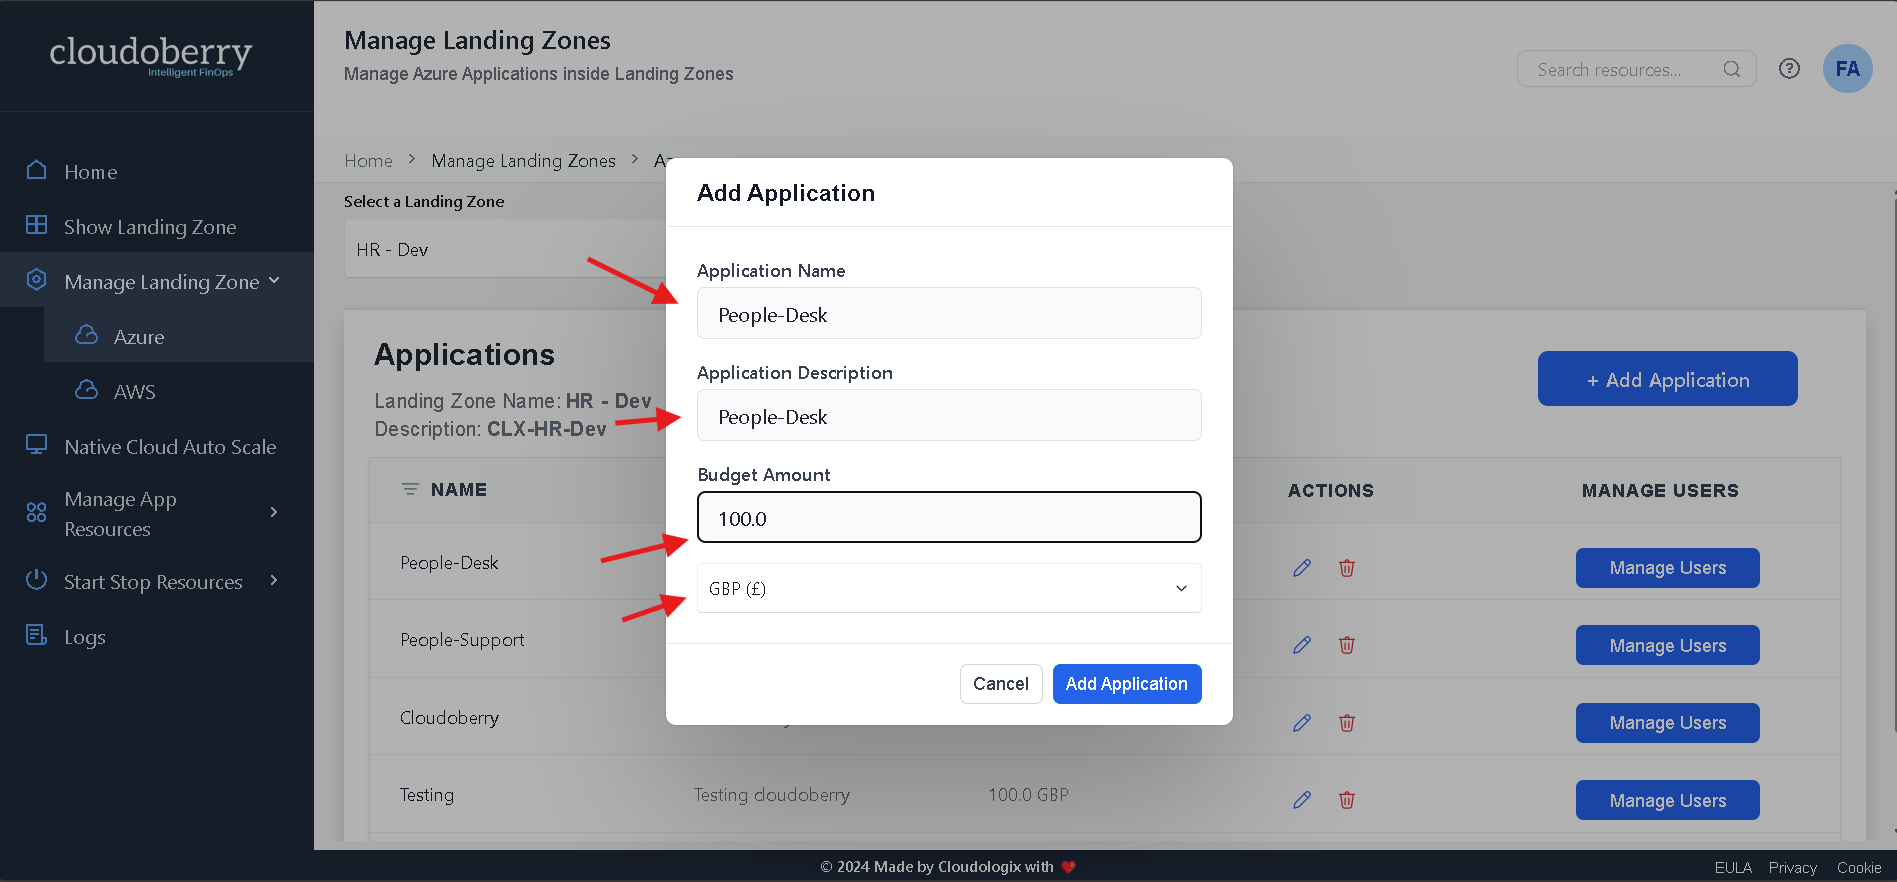
In the "Add Application" dialog, you can set the name, description, budget amount, and currency..
After adding the application, click the Edit button in the "ACTIONS" column to update the description, budget amount, or currency.
To delete an application from the landing zone, click the delete icon next to the edit icon.

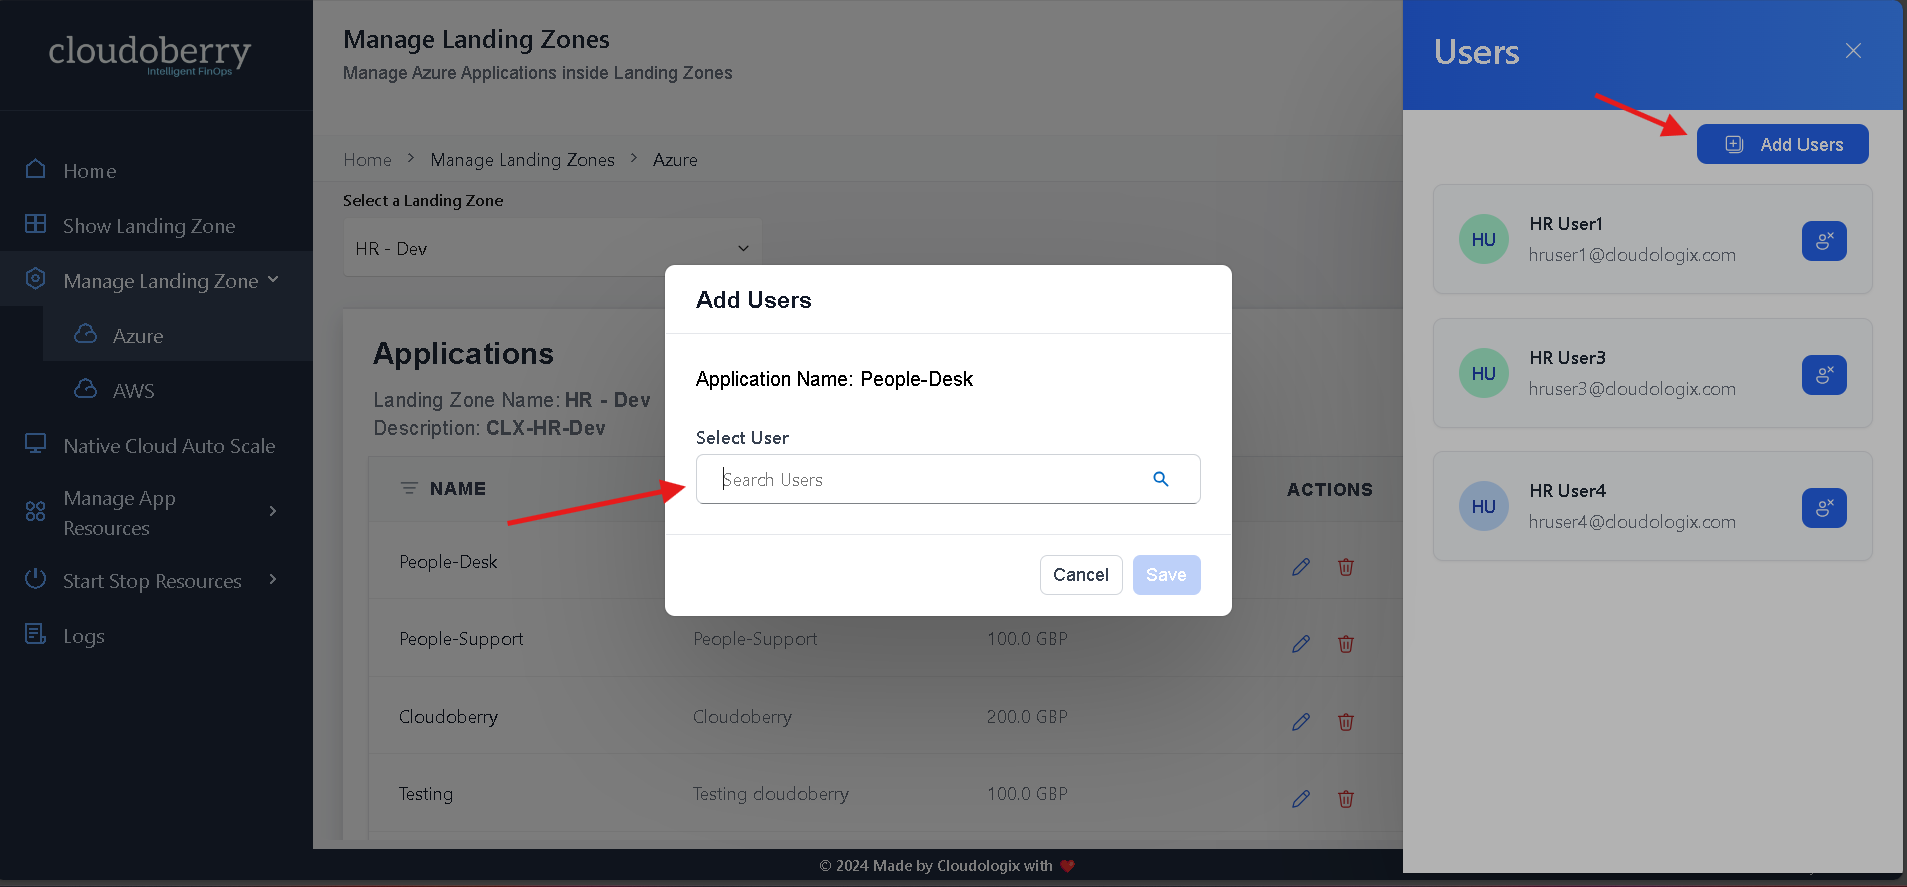
Add or remove users from the application by clicking the "Manage Users" button.
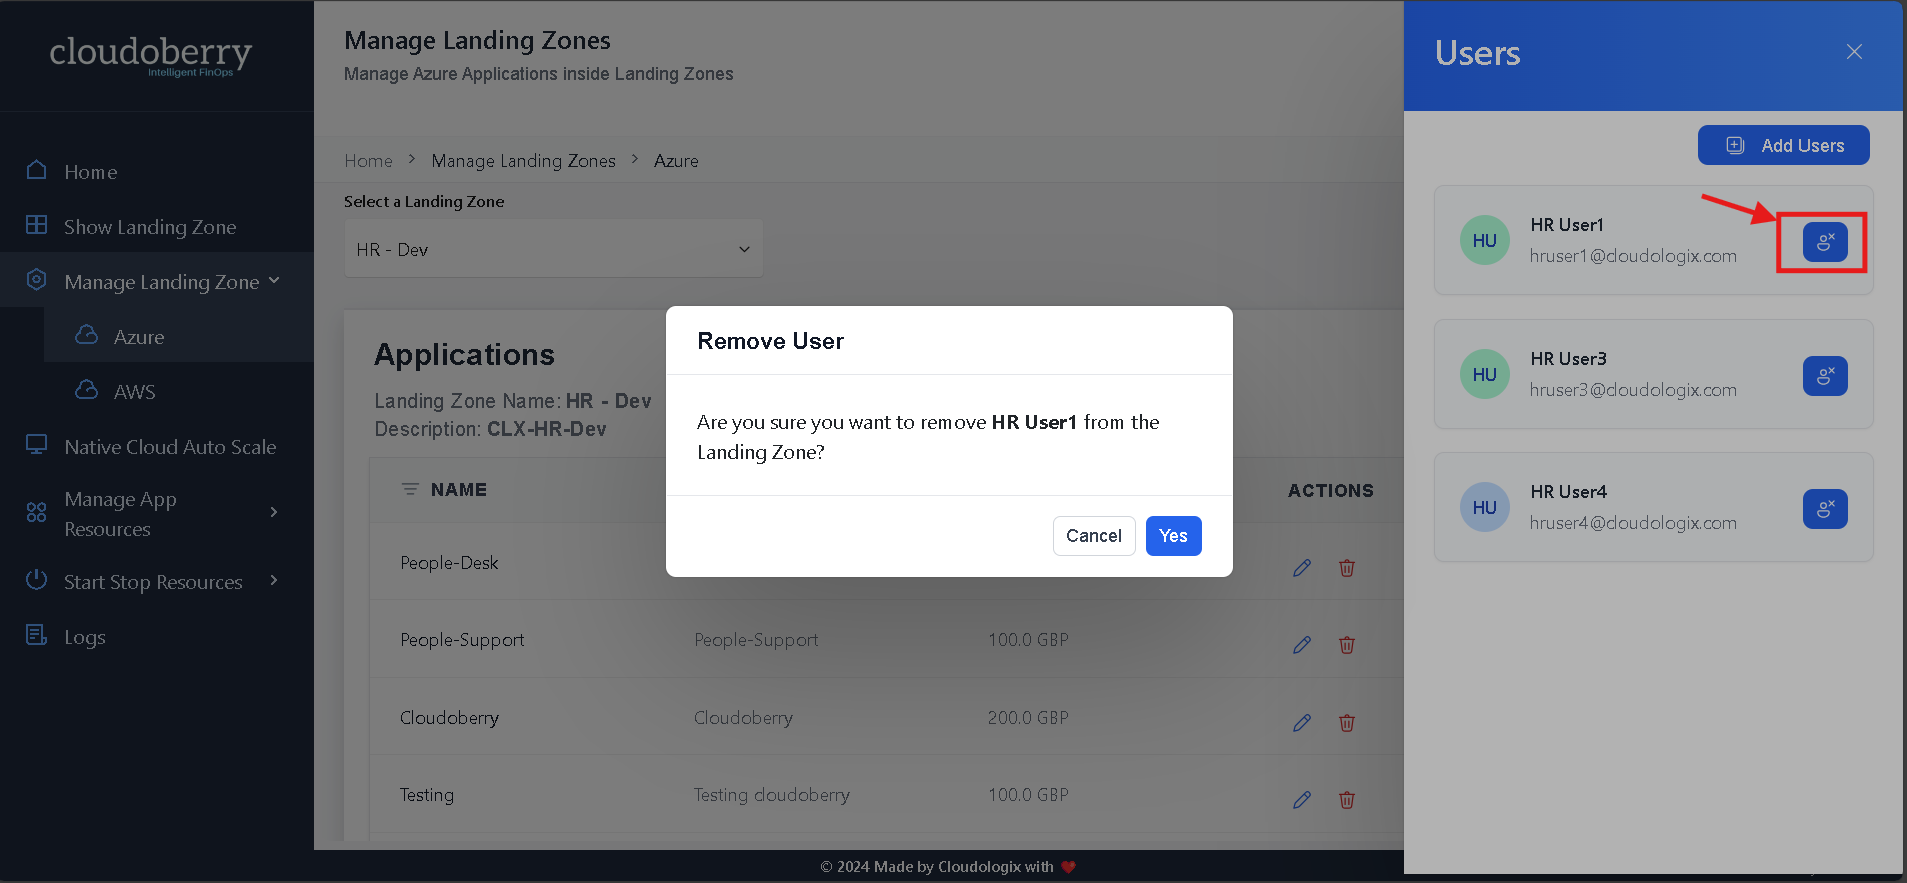
Remove a user by clicking the icon next to their username as shown in the below image.
Team Admins also manage App Resources for different landing zones.
To do this, navigate to the "Manage App Resources" page for Azure or AWS.
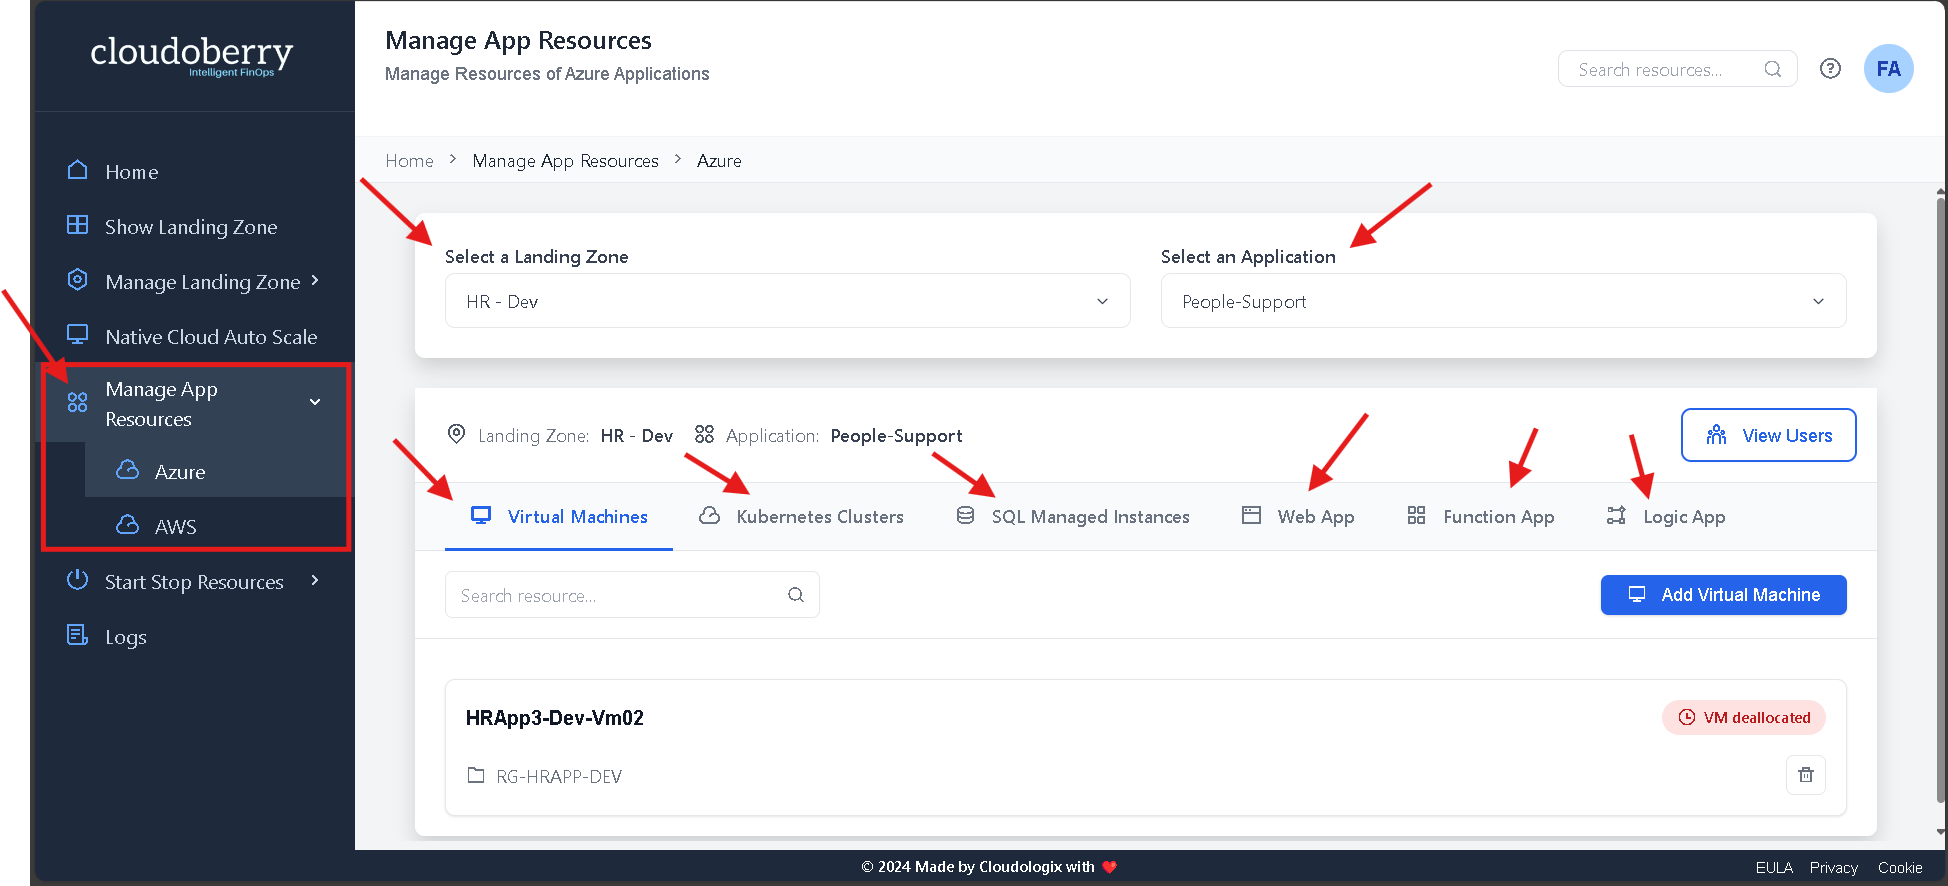
After navigating to the page, you will see various resources. For example, in the Virtual Machine tab, select a landing zone from the ones you have access to. Then, choose an application where you want to add a resource (e.g., a Virtual Machine).
Click the "Add Virtual Machine" button as shown below.
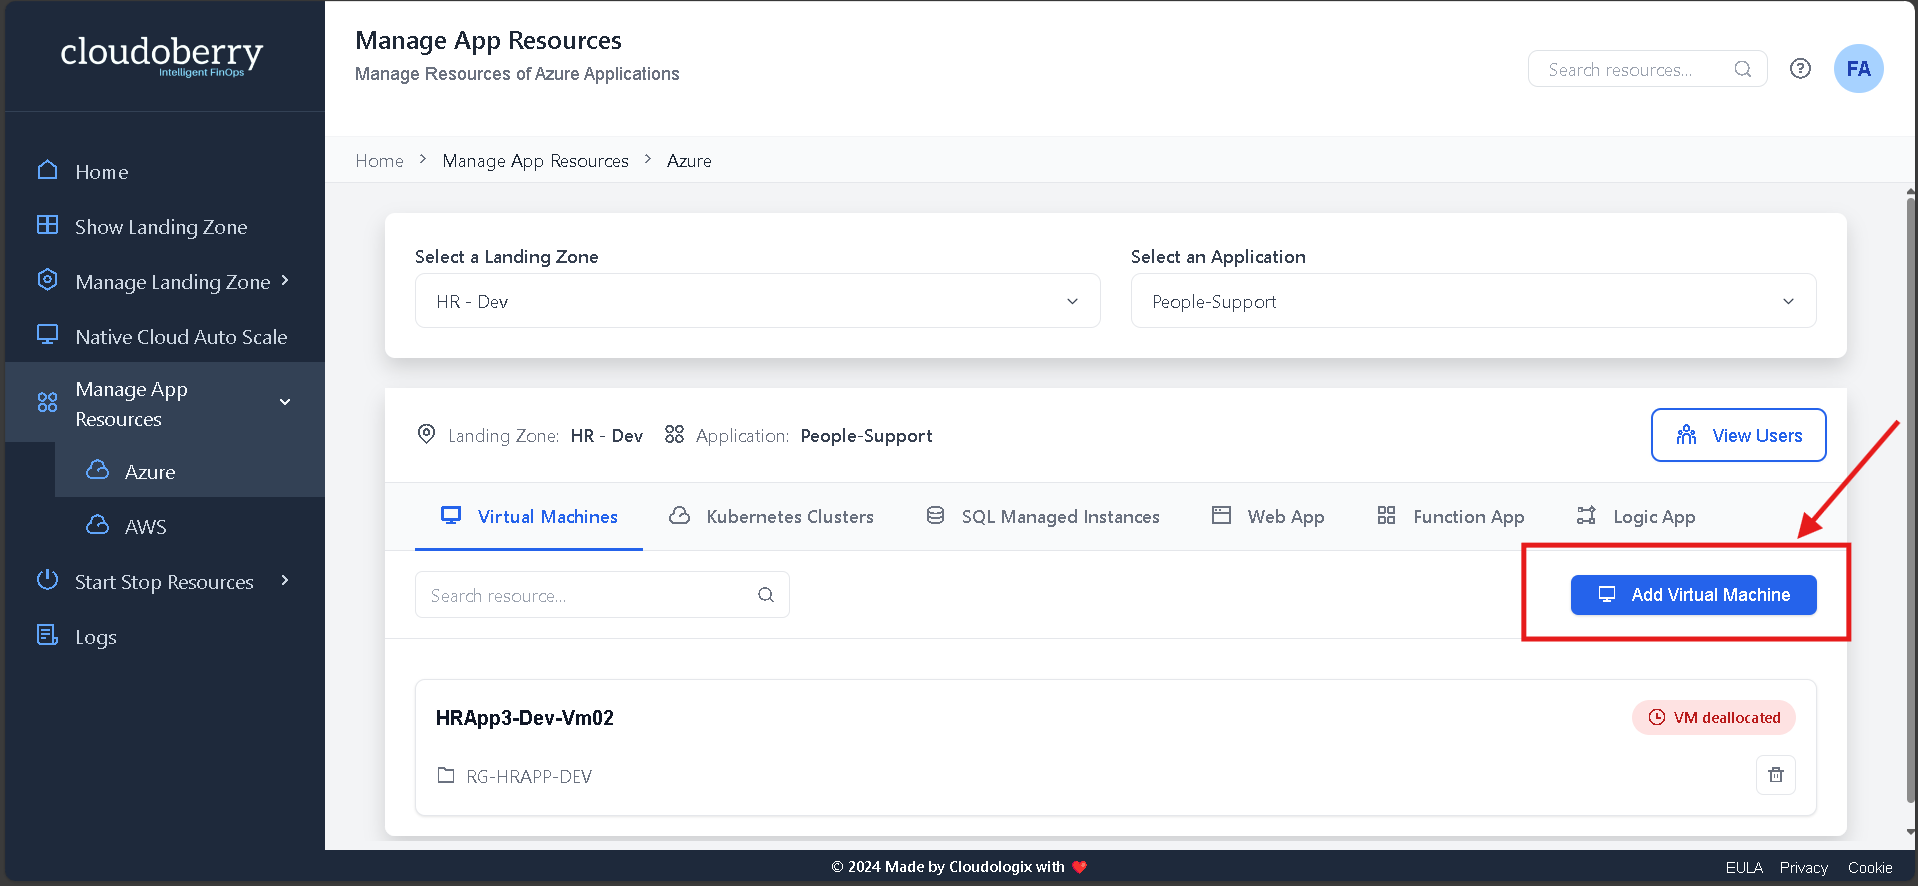
Here, you can add various resources to your application.
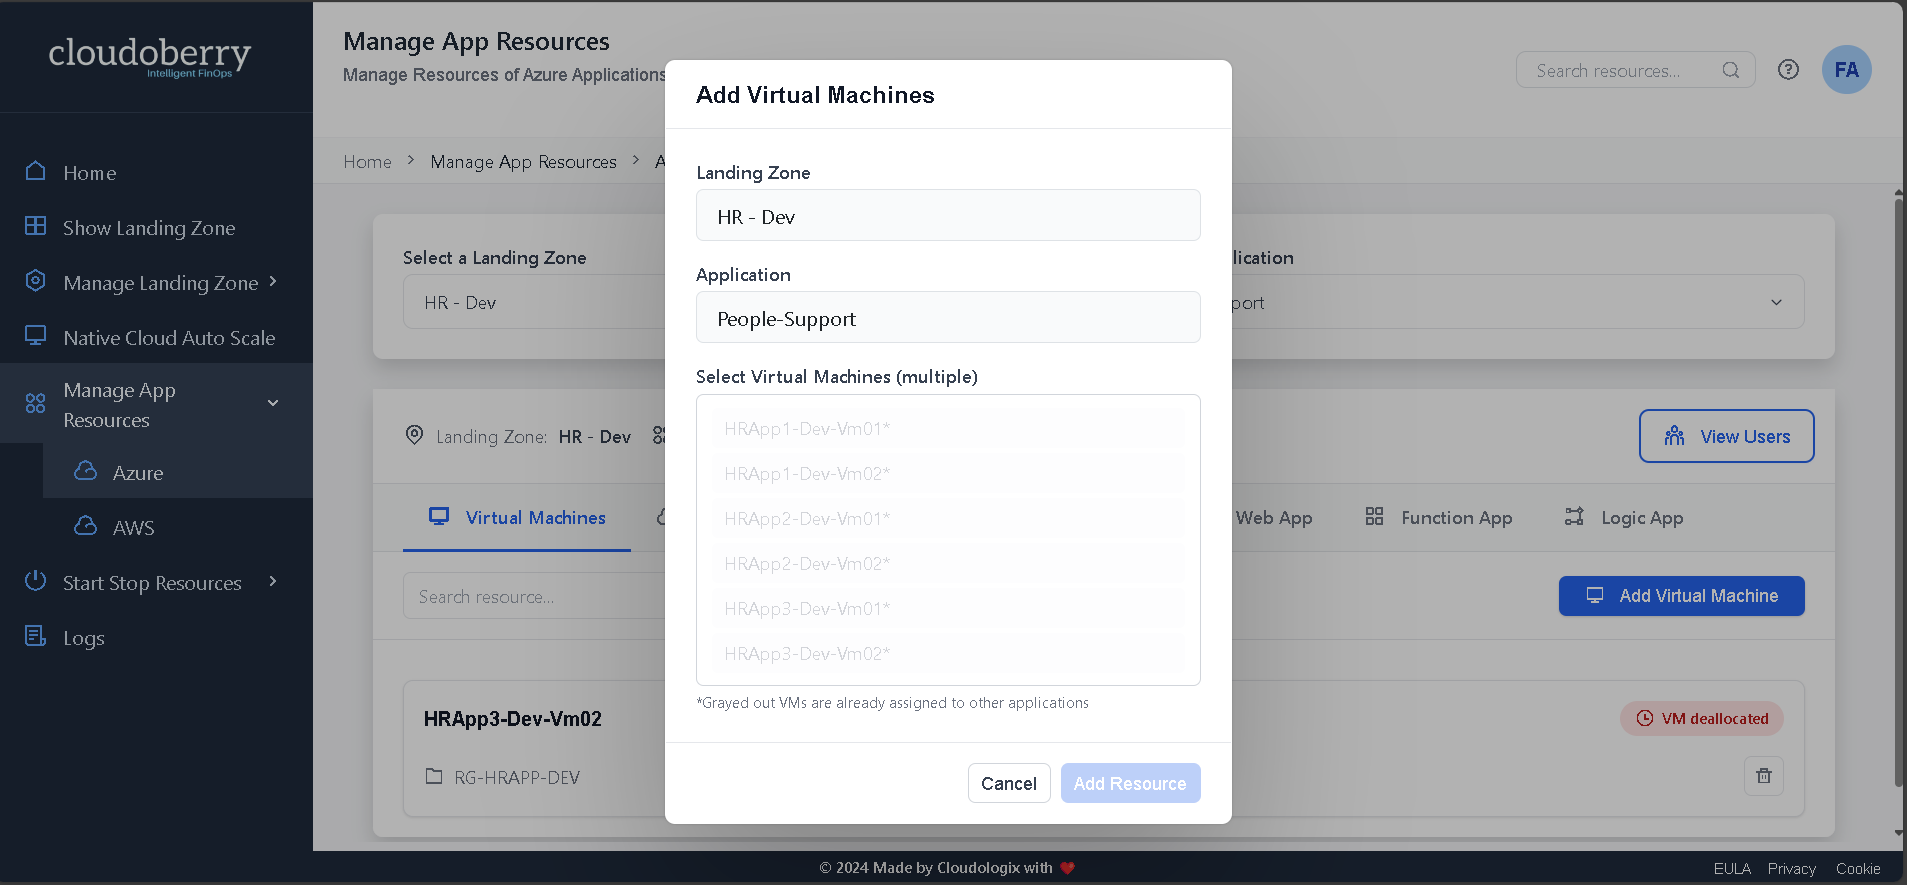
Note: You can only assign a resource to one application, as you can see in the above image all the Virtual Machines were already assigned.
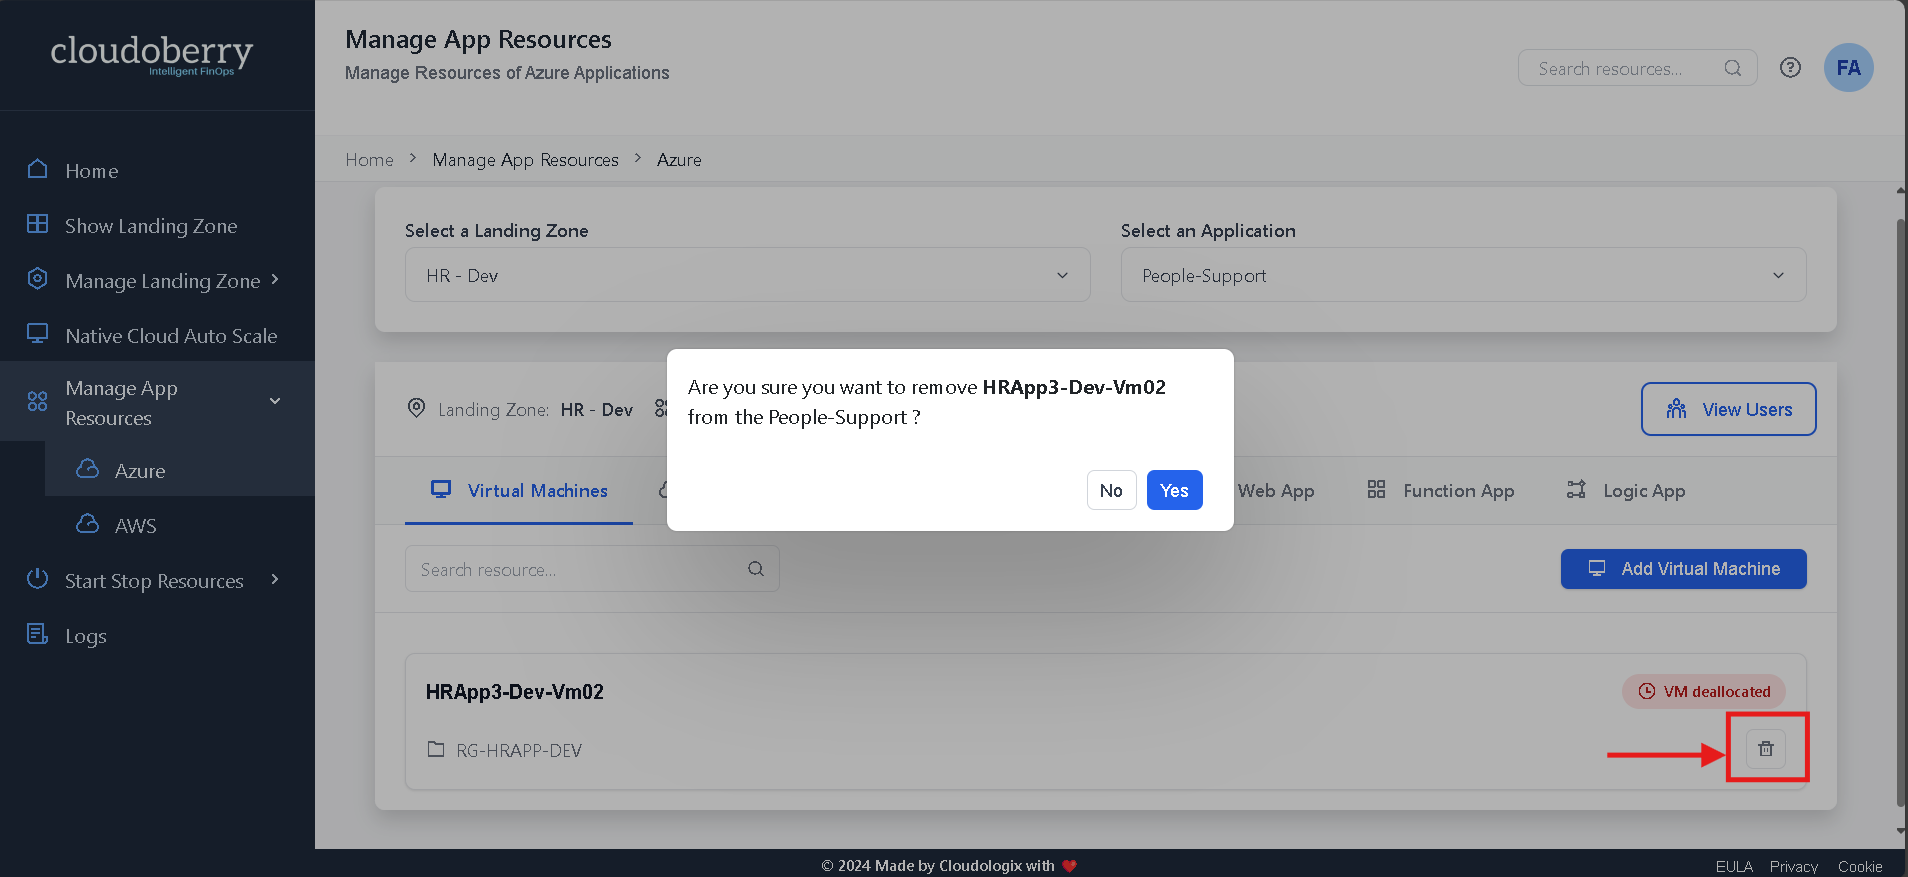
To remove a resource from an application, click the delete button as shown below.
View and manage users assigned to different landing zones and applications by clicking the "View Users" button.
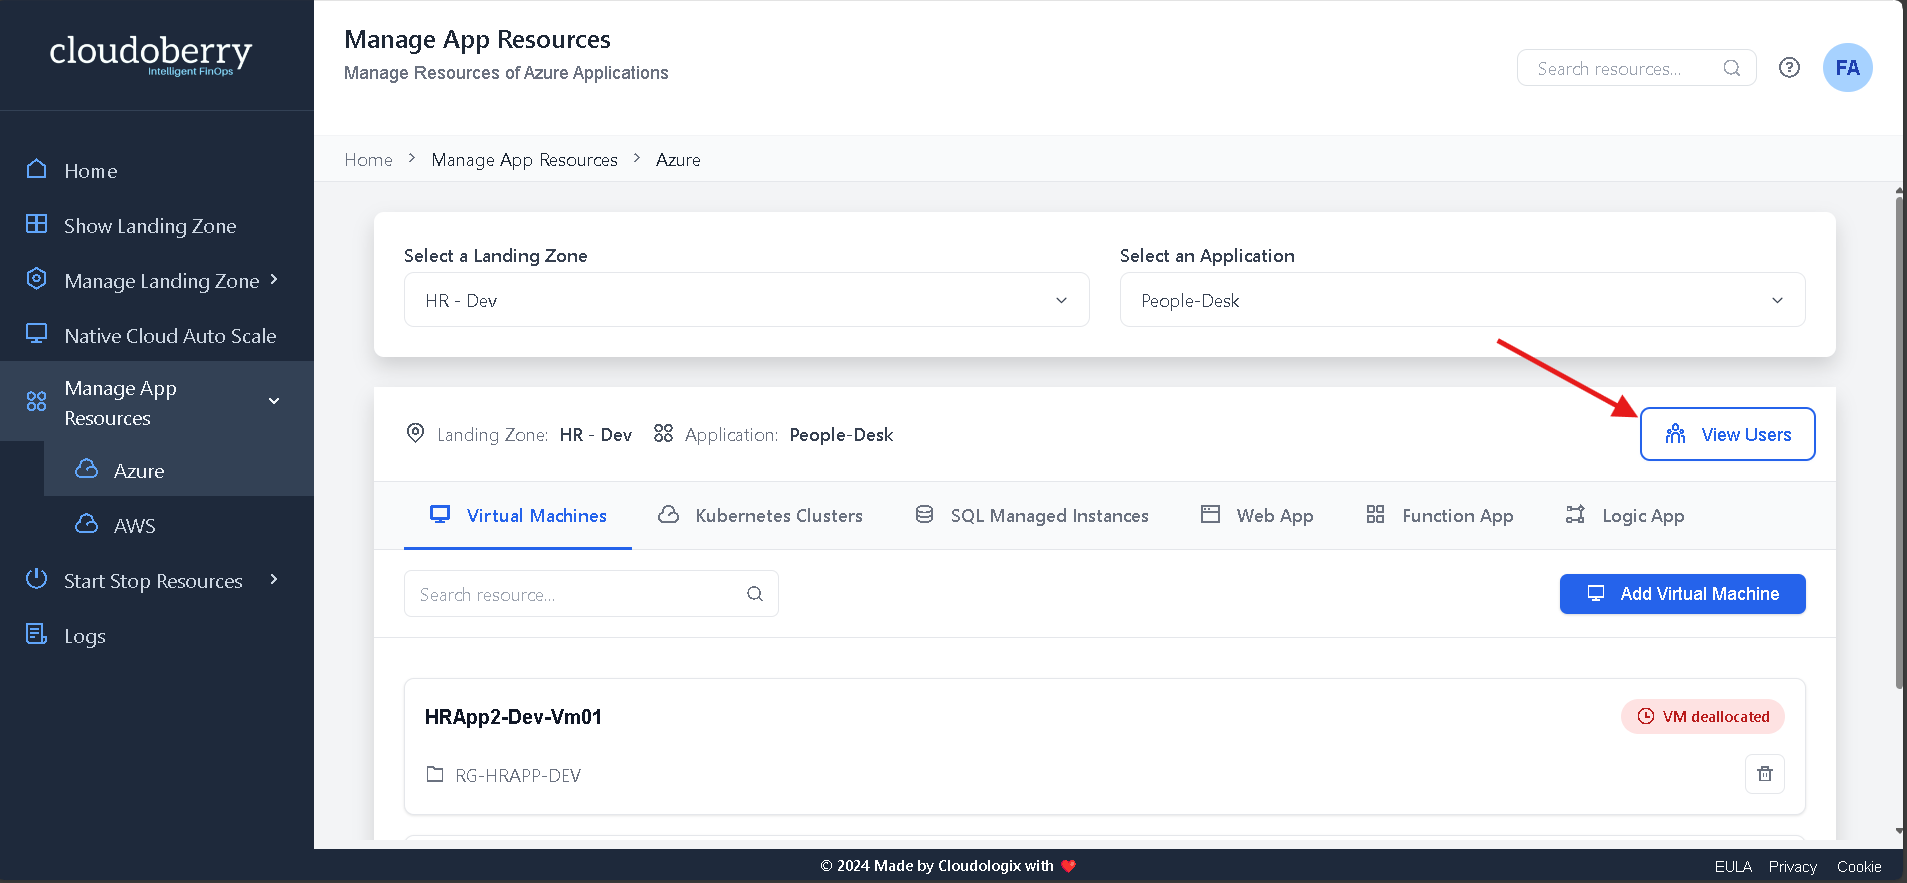
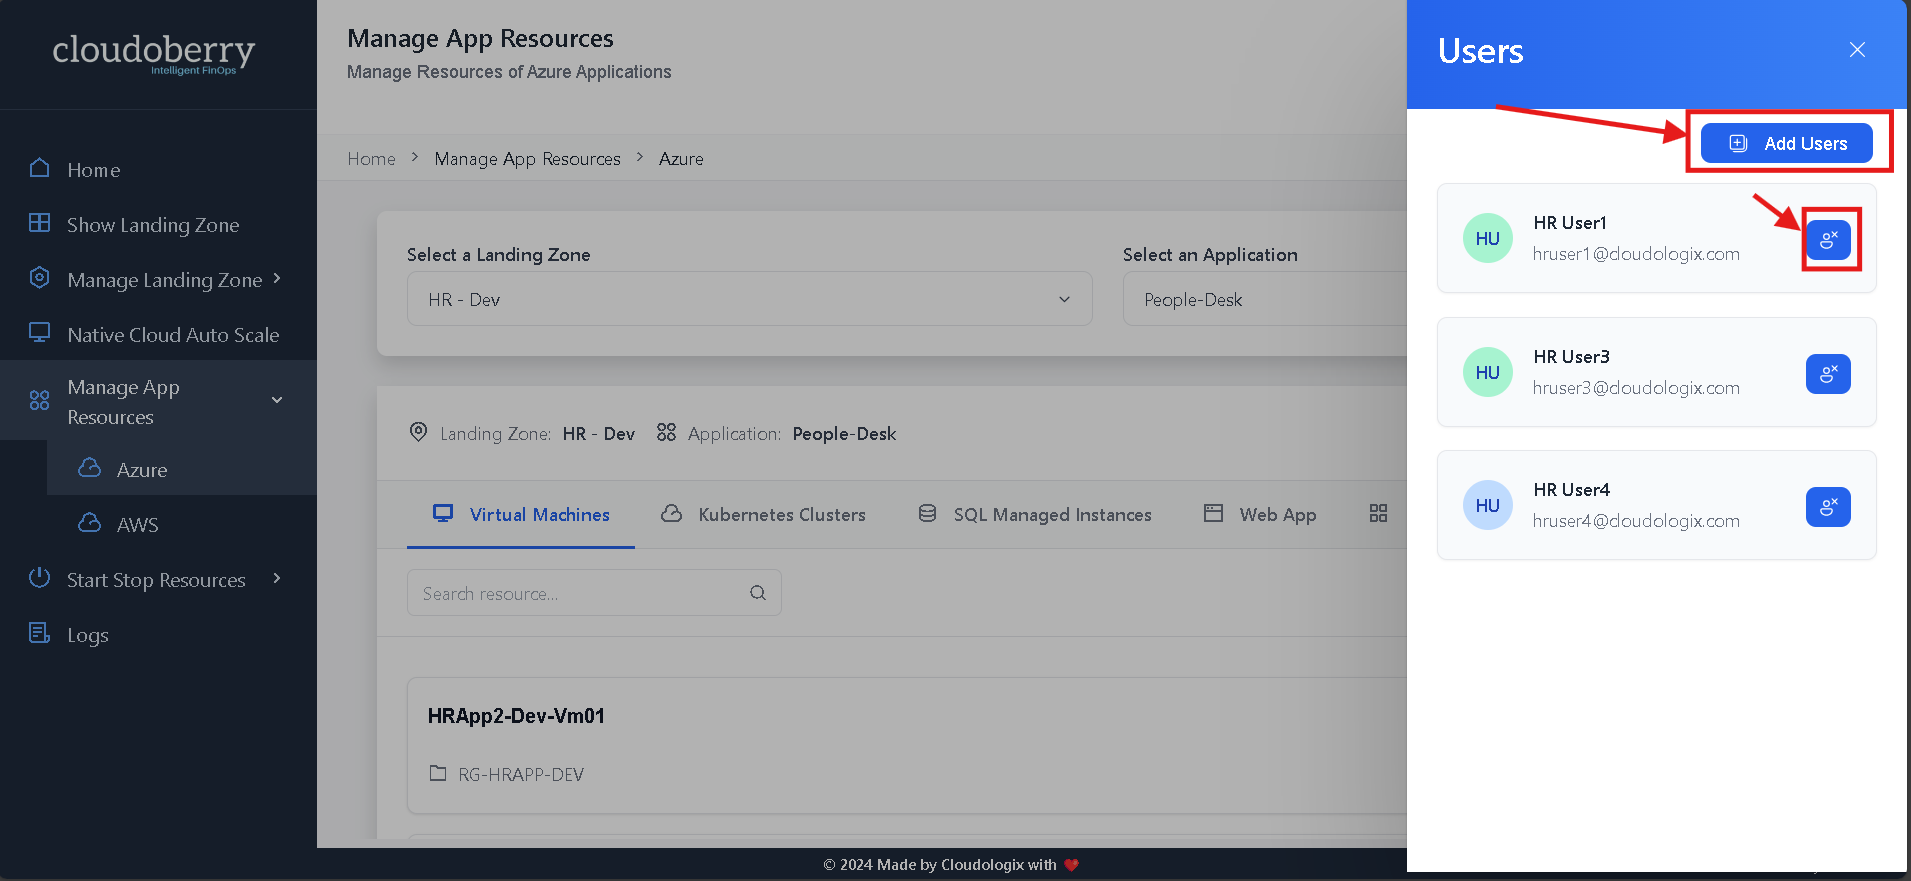
Team Admins can add or remove assigned users from this dialog box.
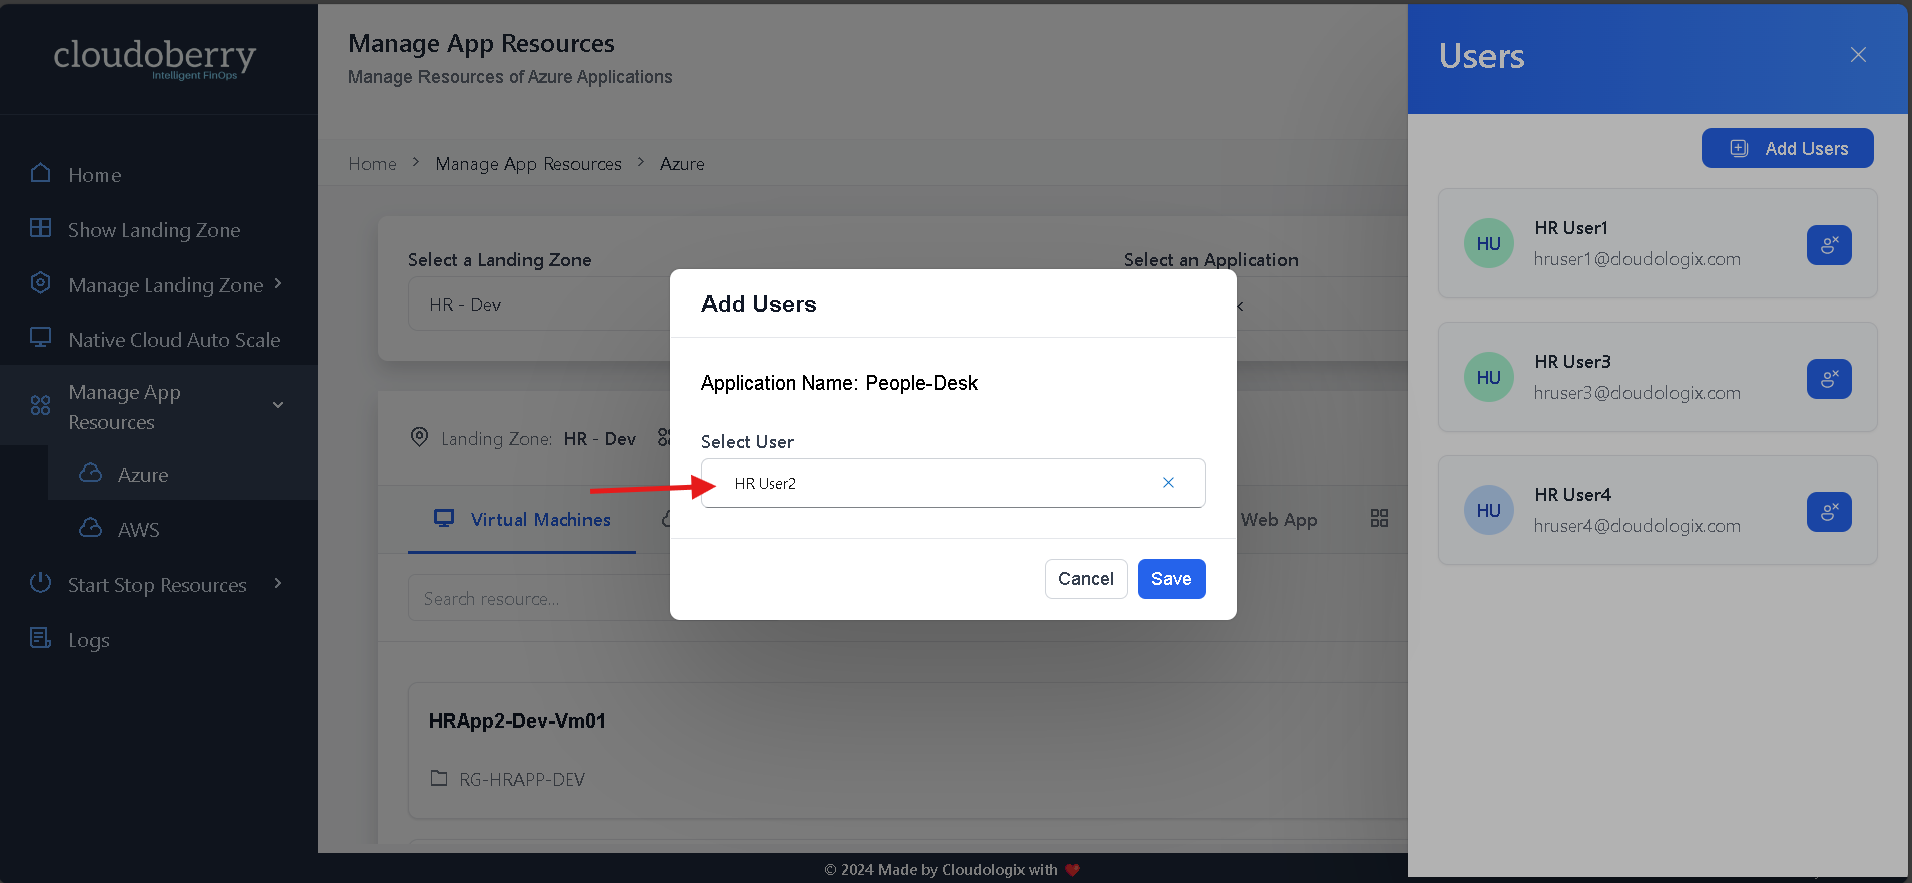
Here, we are assigning a user named "HR User 2" to the HR-Dev Landing Zone for the People-Desk application. After adding the user, they will appear in the Users Dialog Box.
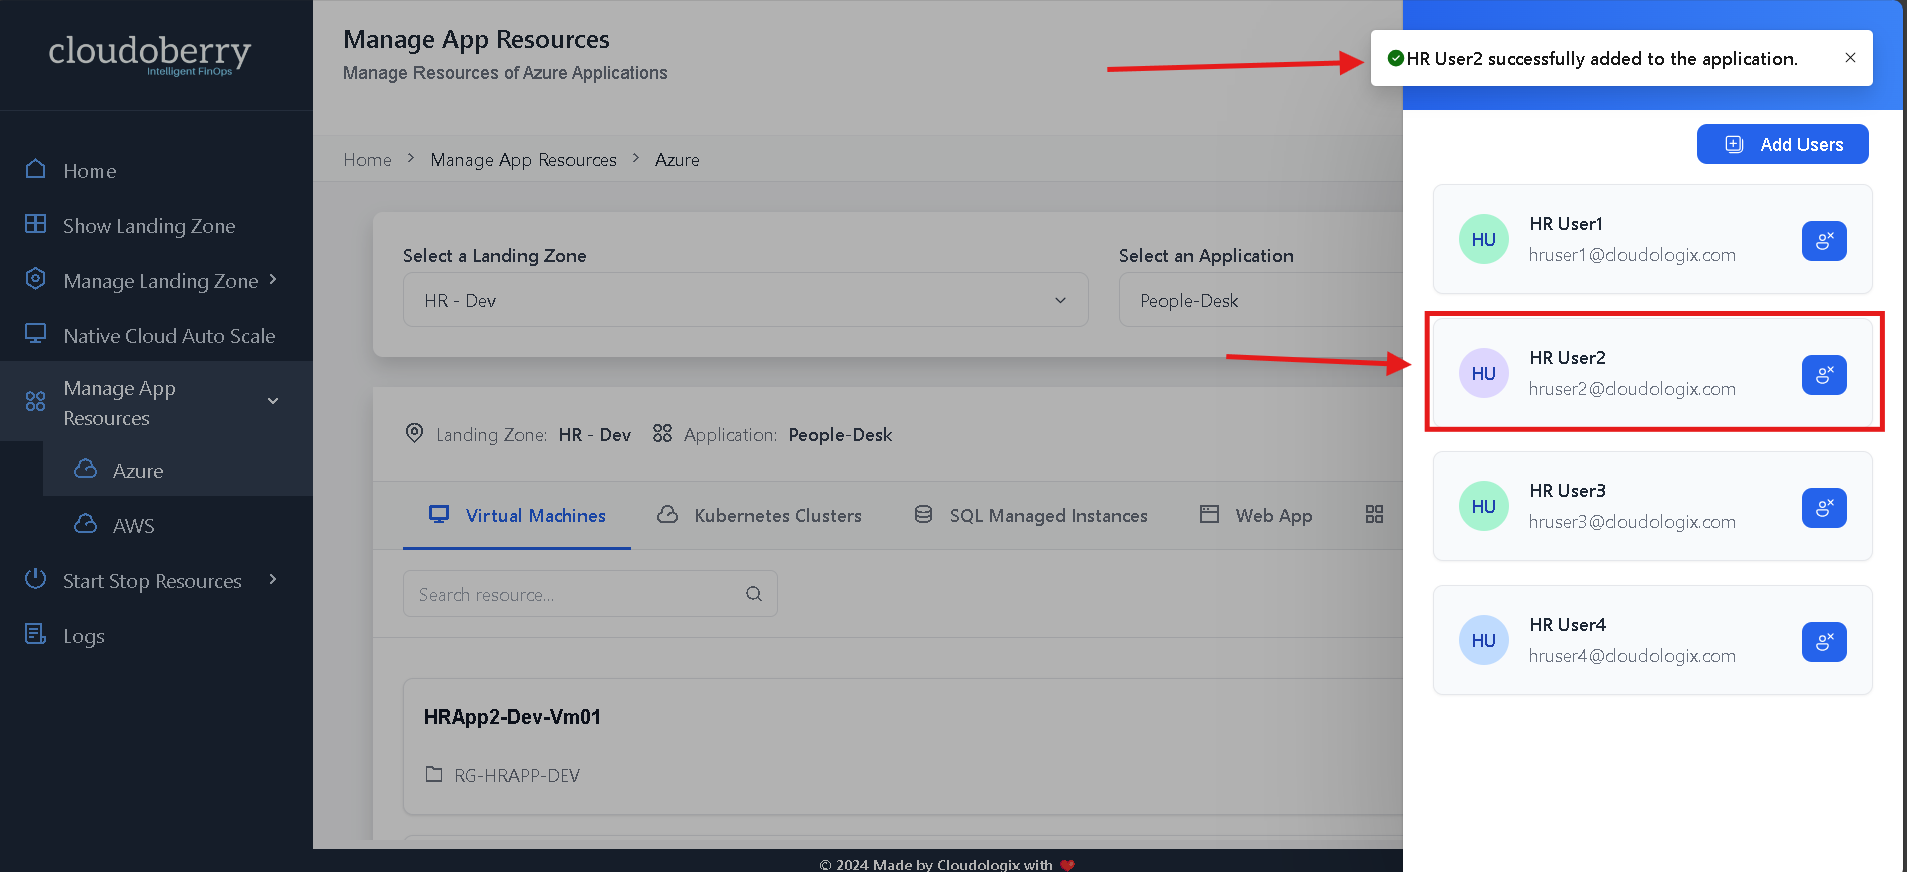
When a user is assigned an application, they will receive a welcome message on Teams, notifying them of the assignment and the person who assigned it.

To remove a user, click the "Remove User" button next to their username.

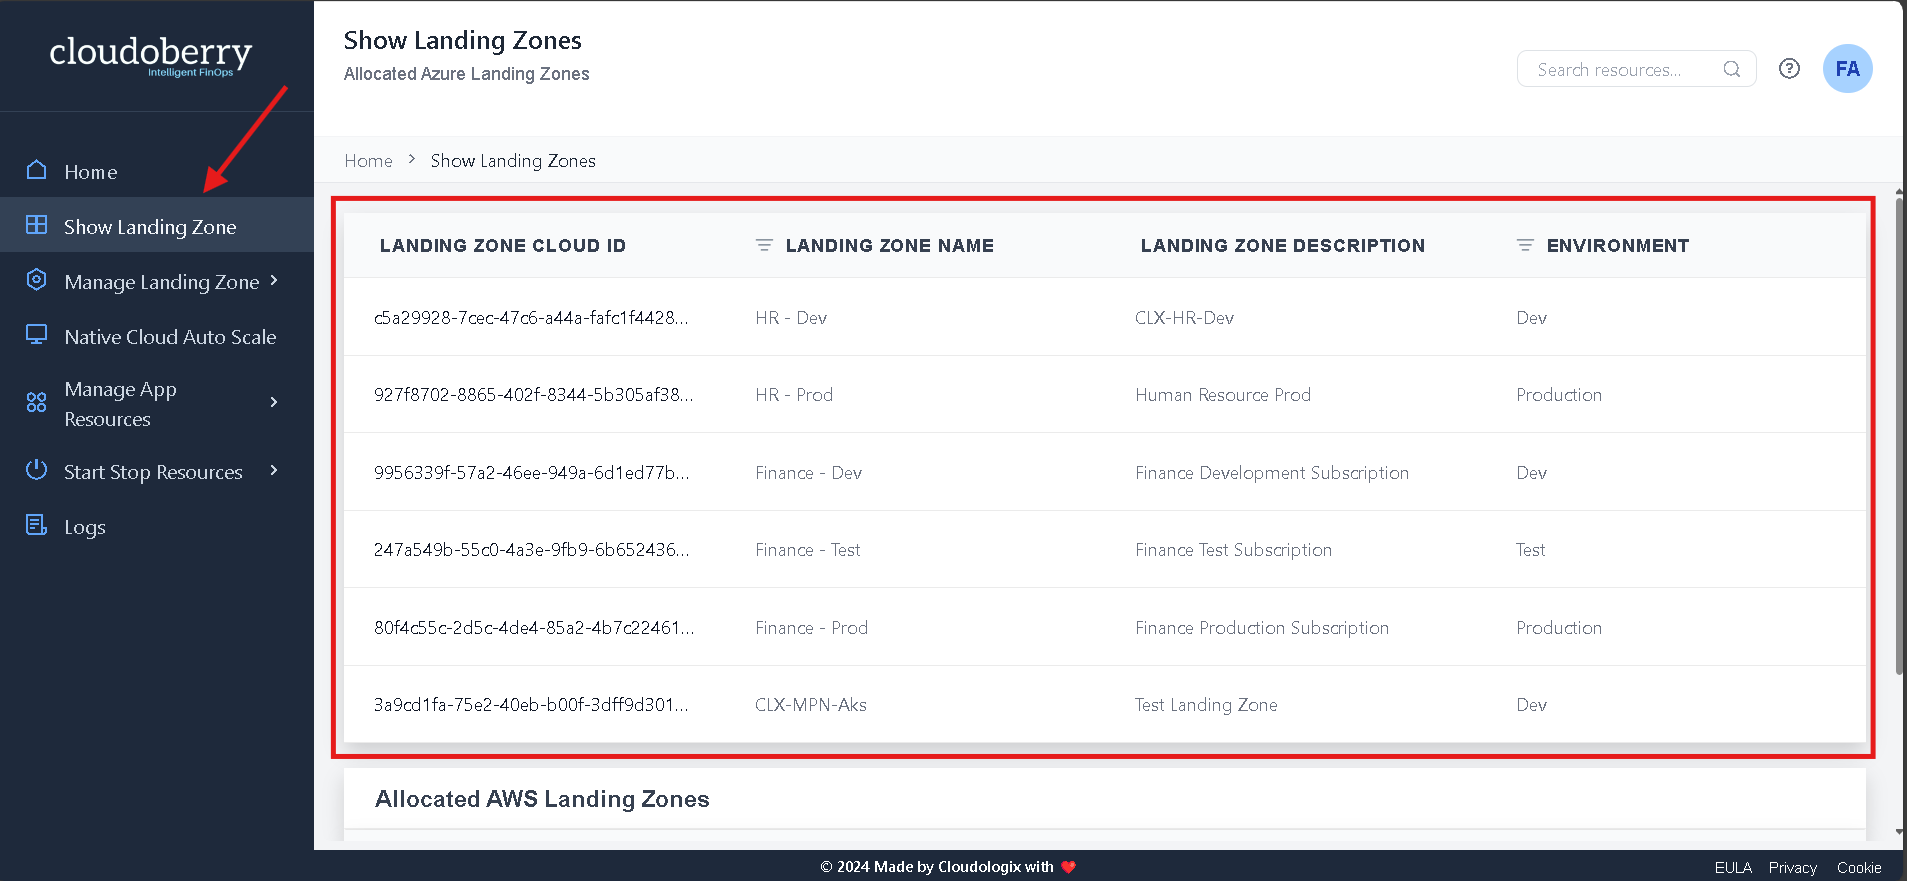
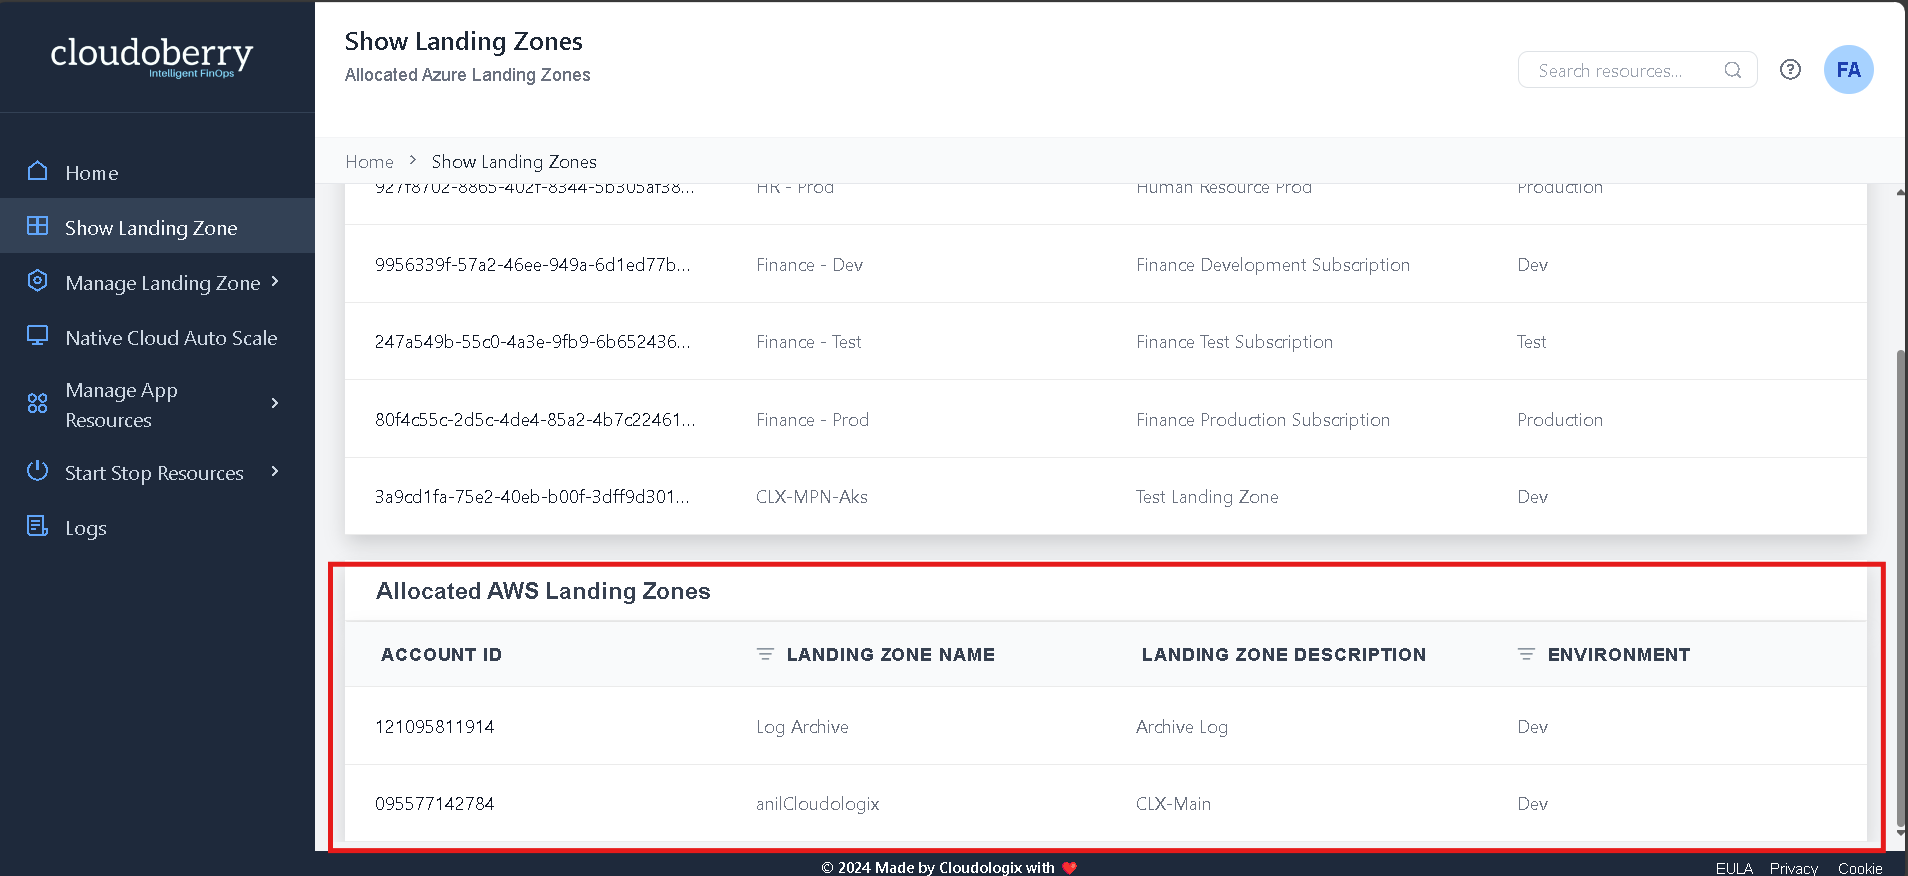
Team Admins can navigate to the "Show Landing Zone" page to view the list of landing zones they have access to for both Azure and AWS.